Wednesday, February 29, 2012

Airplane Art

I was ask recently, by my sister to paint airplanes for my nephew.  Not my strongest point to paint in a realistic way and especially planes.  They seem so perpendicular.  I am more of a round and soft artist but the challenge was fun.  Here is how I put it together.
I thought it might be fun to photograph and make a time lapse of what I did.  This is the first time I did this so the photo's weren't quite as precise as I should have gotten them.  I wanted to share how I created it and how you can also create your own art.  I started by looking at Graphic Fairies site for plane graphics.  I found one and used it for inspiration.  If you wanted to create this you could just trace it on and paint it in.  I did a free hand, though I think tracing would have given me the same finish.

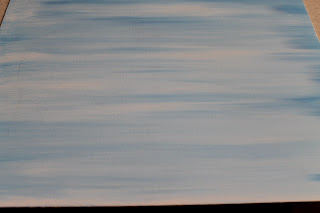
After priming a canvas with gesso, I brushed on white acrylic paint mixed with small amounts of water.

 I continued to add blue until I liked the back ground.
 Once the background was ready, I used a glass to dip in dark blue and paint circles, they represent clouds.
 I them drew on the plane and filled it in with gesso.

 I added the colors for the plane.  I also realized I needed to paint the green under the first wing and not under both so I corrected it.
 I also painted a second one.  It is a bit blimpy but I still think It turned out great.
Let me know what you think and if you have some art, I would be glad to stop by your site and take a look.  I love comments and new friends.

Linked at
http://www.shabbynest.blogspot.com/search/label/Frugal%20Fridays


shabby creek cottage

Tuesday, February 28, 2012

Natural Color Eggs

This year I thought it might be fun to naturally color eggs for Easter.  We really wanted to try the colors on several things so I let my boys pick out some materials to dye.  We went with white yarn, white shirts from JoAnn fabrics for $4 a shirt, and Eggs.  I pulled out our frozen berries for blues and purples.  Onions make brown, spinach for green, and beets for reds, and Carrots for orange.  Mustard for yellow.

You throw the color ingredient in a pan with water and simmer for 10-15 minutes.  Strain out the solids and mix in vinegar 1 tsp.  Set the eggs or what ever you are dying and have great colors.  It is fun to see how we can create things at home and actually see where they come from.


 I set a goal this week to only use what I have on hand.  I did not have all the things for the colors listed above but my boys started coming up with ideas.  It became our little concoction party.
 I had some Chlorophyll on had and used it for green.  It separated with the vinegar so it left spots instead. I did use it with out vinegar and it worked great. They dried on and look great.  Black beans made a gray and cinnamon with onion skins made brown.  If you add to much vinegar it will create bubbles on the surface and scratch off the color.  It will dry on if you are careful with the eggs.
 The blue berries made the best and darkest color.  My son got a little wild with the vinegar and thought adding more would be better.  That is why they have scratch marks on them. 
Overall my boys loved seeing how we can make colors out of our cabinets.  They wanted to try other things to see what worked.  Prune juice makes a great soft orange, cranberry juice is a soft lite red, and mustard did well with yellow.  I am definitely doing this again with my kids, it was so much more fun.  Let me know how yours turns out, I would love to see them.

Tricia Marie

I am linked at

you are talking too muchhttp://savvysouthernstyle.blogspot.com/


shabby creek cottage
The Shabby Nest

Sunday, February 26, 2012

Nothing like some comfort Creme puffs GF

This weekend has been a hard one.  I just have had a hard time with my kids, dealing with a messy house that I just want to be clean, and having to hold baby in one arm and try to get something done.  I set out to organize my boys bedroom and just did not get far.  My frustration level is up and I just wanted to have some cozy.  I pulled out my Mom's recipe box and decided to make her homemade creme puffs with pudding.  Here is goes. (they can be gluten free see below)


Custard Filling
3 egg yolks
1/2cup sugar
2T Flour        1 T butter
2T corn starch  1 1/2 t. vanilla
1/2 t salt
2 c milk
2 cups cool whip


Put eggs and dry ingredients in double boiler
Mix and heat until boils one minute
remove and add in butter and vanilla.
Let cool and fold in cool whip.


Creme puffs

1 c water
1/2 t salt
1/2 c butter
1 c flour
4 eggs

Heat oven 375,  cook 45-50minute 6 large or 24 small

Water, salt, and butter in saucepan and heat to boil.  Remove and pur flour all in to hot mixture.  Heat again to make a paste that pulls away from edges.  This does not take much to heat.  Beat to mix and cool.  Add in eggs one at a time.  Beat after each egg until mixed.   Drop batter on cookie sheet and bake until puffed and golden.

Let cool and cut in half.  add in custard.


I did make these with Bob's Red Mill all purpose gluten free flour and it turned out great.  It did not taste any different than my Mom's.

I am linked at
http://savvysouthernstyle.blogspot.com/
you are talking too much
http://www.tessadomesticdiva.blogspot.com/2012/02/allergy-free-wednesdays-6.html

Saturday, February 25, 2012

Domino pendant

Even though I have a brood of boys (FYI brood is three or maybe three is just a gaggle not sure:) I do like to make some easy girly crafts too.  Of course my Teen daughter thinks I am just lame. Yesterday alling me a Portland mom.  I asked her what that meant as I may have a different idea of Portland mom.   Her idea was different, she meant someone that makes "things and stuff".  I thought it would be closer to a tree hugging, recycler, that uses rain water to wash, then collects the wash water to water the yard.  Since I am a closet hippie I do not admit to any of these things. ( Besides I use the bath water to wash the bathroom and water the house plants.)  Any whoo,  I made these cute pendants from the Dollar store domino's, stickers, and chain that I saved from decoration on a pair of jeans. 
 After the stickers go on, use this Dimensional Magic to put a clear coat over the top.  Be careful not to add too much.  It can easily go over the edges.
 I glues a loop on the back and it' s ready for a chain. This one was to girly for my hipster daughter so...
I made one a bit more organic for her.  I used a large clasp to hod it to the chain.  She liked it and put it on for me.  I gave the other one to my little niece and she liked it. 

See my post at these link party's


you are talking too much http://diyhshp.blogspot.com/
http://soverycreative.blogspot.com/

Friday, February 24, 2012

Finger Knitting DIY scarf


My little niece started me on finger knitting.  I have never seen it before so I thought I would give it a try.  I decided to create this scarf, as I love scarfs.  It is easy, inexpensive, and you can use your left over yarn.  My son has been making them for his friends at school, so it's  great for your kids to easily learn.  Here we go...

 Place yarn across palm from thumb to pinkie.
 Wrap around fingers and then wrap around back.


 Wrap around front to thumb. 
 Pull loops on fingers over the loose yarn on front of hand and off the finger.
 Yarn should go again around back and around front to continue to pull loops on fingers over loose yarn on your palm.

 This is pulling the yarn on your finger over the loose piece on you palm.
 After you have knitted a few rows, pull the string in the back to tighten. 
 You should only have one loop on each finger through out. 
It works quickly once you figure it out.  I would love to hear from you so please comment.  I also loved to be pinned.

 I loosely wrap around my neck.  I loved this purple it's great for spring.


Happy Knitting!!!  


Visit me at you are talking too much  on the link party.

http://soverycreative.blogspot.com/